Take a page from the “Beautiful Oops” book, literally! Try your hand at this activity and see how a hole in a piece of paper can be turned into a 3D work of art. Check out the video below to watch Education Associate Miss Sophia read “Beautiful Oops” by Barney Saltzberg.
Materials
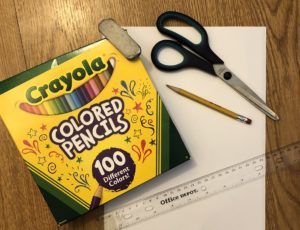 White paper
- Pencil & eraser
- Ruler
- Scissors
- Tape or glue stick
- Colored pencils or markers
Instructions
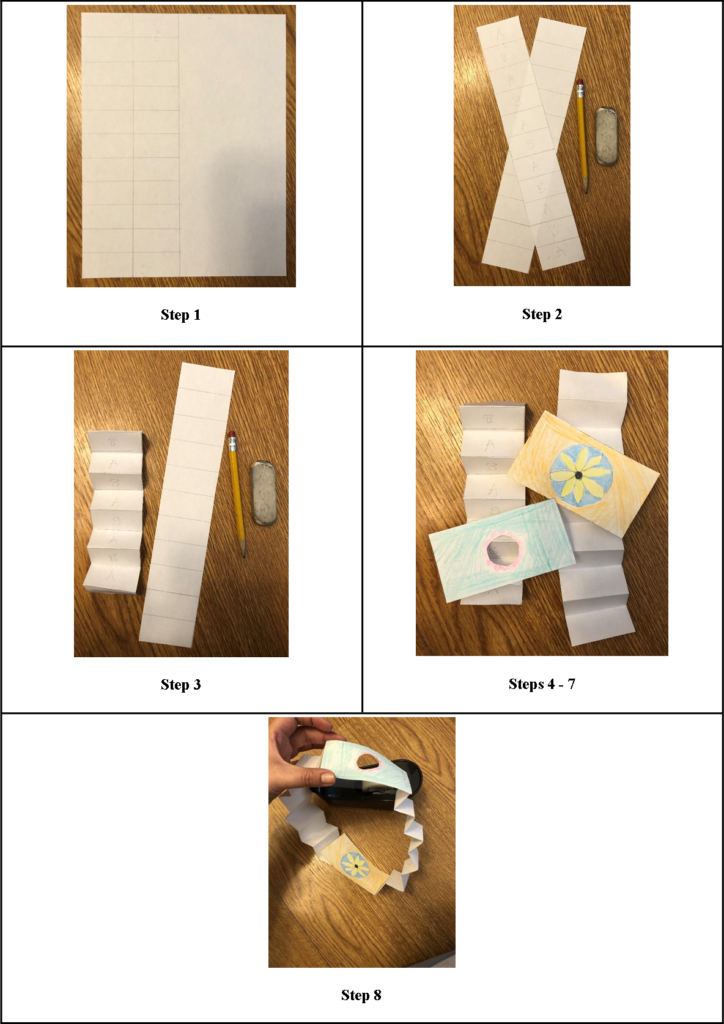
 Using an 8.5” x 11” piece of paper, draw two strips about 3” wide that run the full length of the paper. To ensure the “Z” folds are equal, draw the lines running the length of the paper an inch apart.
- On each side, lightly mark each section in an “A-B-A” pattern (you will need this for step 8).
- To make the fold, start at the base and fold up at the first line, under on the second, up on the third, and so on. To help stay on the line, use the edge of a table or your ruler.
- Cut out seven rectangles, with the shorter sides the same width of the strips. The length is up to you, we
 recommend 4.5” to 5.5.”
 - For the top rectangle, draw a small hole in the center of the rectangle (about the size of a quarter) and cut it out. Design a fun border around the hole and fill in the rest of rectangle with a solid color.
- On the remaining rectangles, trace a larger circle about 2” wide and cut it out. Create unique boarders around each hole and color each rectangle in with their own color.
- Use one of the rectangles for the bottom piece. This time, instead of cutting out the circle, draw a small picture in the center of the paper.
- Take your strips, and where you have marked them “A” is where the rectangles will be attached, either glued or taped.
- Once you have all rectangles glued to the strips, you will be able to look through the top hole down through each layer to your picture on the bottom.
