Materials
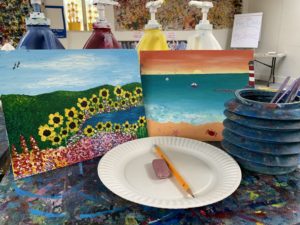 Canvas – If you do not have canvas at home, cardboard or sturdy/thick paper will work well.
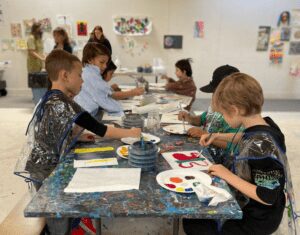
- Paint – The Museum uses acrylic paint since it dries faster.
- We also only distribute the primary colors + white, so students can mix their own secondary colors.
- Paint palette – The Museum uses a paper plate.
- Paintbrushes – Q-tips work well if you don’t have brushes at home.
- Water, water buckets, and paper towels
- Regular paper and pencil (optional)
Instructions
- If you would like to, sketch your design out on a piece of paper first.
- When you’re ready, transfer your design onto your canvas.
- Don’t forget to incorporate your horizon line, fore, middle, and background!
- Paint away!
Additional Information
Landscape/Seascape painting is one of the most popular field trips art projects at the Museum. Have your students explore outside, look at photographs of nature, or just use their imagination to create a scene of their own.
Students are encouraged to sketch out a design first on a piece of paper, and then on their canvas. This way they can plan out placements of things and can experiment with space and perspective.
There are four areas in both a landscape and a seascape that make the paintings look more realistic and three dimensional.
- Horizon line – A horizon line is a line drawn across the picture. In a landscape/seascape painting, it distinguishes where the sky meets the land/water. Its placement determines where the viewer is looking from, whether it is from a high place or close to the ground.
- Foreground – The foreground is generally closer to the bottom of the composition. Because this part of the scene is closest to the painter/viewer the objects appear to be larger, brighter in color, and much more detailed.
- Background – The background of a scene is the furthest away. It gives some context to the scene, such as where it might be taking place. Because items in the background are meant to appear farther away, they are much smaller in size, duller in color, and are less detailed than the objects in the foreground.
- Middleground – The middleground is the space between the foreground and the background. Like the background, objects located in the middle ground might appear smaller, as well as less colorful and detailed than those found in the foreground. Just remember, things in the middle ground will appear larger than those in the background!
By incorporating the above into their composition, students will be creating the illusion of space. Space will make their two dimensional canvas appear to be more three dimensional and natural.
For older students who are up for the challenge, have them incorporate the following steps into their composition for the illusion of depth!

