Materials
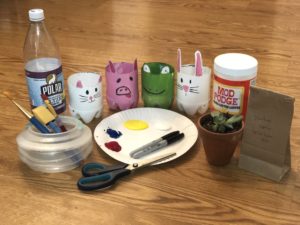 Recycled plastic bottle (2 liter size recommended)
- Scissors
- Sharpie or marker
- Paint
- Pallet (a paper plate works nicely)
- Paint brushes and a water bucket
- Paper towel
- Mod Podge (optional)
- Soil
- Seeds, flower, or herb of your choice
Instructions
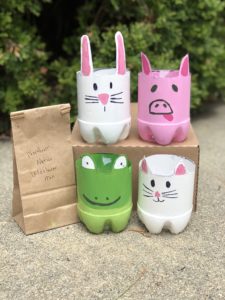 Collect the recycled bottle or bottles you wish to use.
- Using your marker, draw the shape you want the top of your planter to be. Get creative and turn your planter into a bunny with long standing ears or add rounded or triangle ears to become a frog, pig, or cat. Using your scissors, cut the bottle following the lines the best you can. !Adults, you may need to help with the cutting process, as a knife is helpful to make a space for the scissors to begin cutting!
- Next, cut small holes on the bottom of the bottle to allow for water to drain out. This step depends on what type of plant you are using. Tip: The plastic on the bottle’s ‘feet’ are thin and easier to cut through than the direct middle.
- Paint the outside of your bottle to match the animal shape of your choosing, or create an abstract design. It may take 2-3 coats to ensure any marker lines are covered. Once the paint is dry you can paint or draw on the animal’s face or pattern.
- Since plants need to be watered, if you have Mod Podge, brush on a layer to help create a seal and prevent water from washing away your design.
- Once the paint or glue has dried, fill your new pot with soil and add your plant or seeds!


